How to Import and Categorize Your Transactions
This article shows you how to import your transactions from your bank CSV export. If you're interested in how to automatically import and categorize your transactions please check out our article on how to connect your bank account here.
Importing your transactions from a CSV file such as a bank download is a great time saver! A great process is to export your transactions from your bank and import them into Direct Sidekick monthly. Once imported it's super easy to categorize them and you're done!
*** Make sure the dates in your CSV file are in the mm/dd/yyyy format. ***
Click the “Import New Transaction” button in the upper right corner.

Click the Choose File button. Then choose the CSV file on your computer by double-clicking on it. If the columns in your file have titles (headers) keep the checkbox checked. Then click save.

Match the column names (titles or headers) in your file to our field names by clicking on the dropdown in the right column. Then click the import data button.

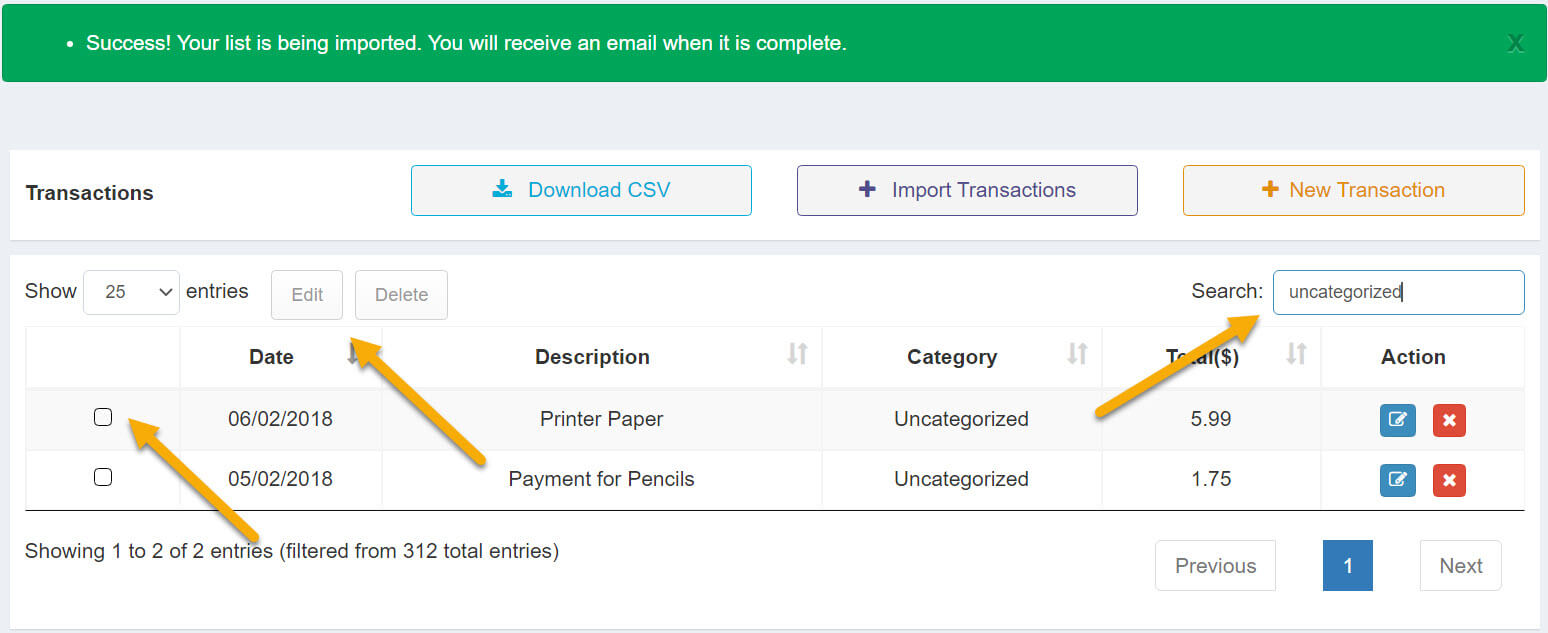
- You should see a green success message at the top. You will also receive an email confirmation when the import is completed as it may take a little time depending on how many transactions are in your file.
Start typing the word "uncategorized" (without quotes) in the search box to show only those transactions. Then click the checkbox(es) on the left for the transactions you would like to categorize as the same category. In the example below, I would check both of the boxes. Once the checkbox is checked you can click the edit button.
Now choose the category the transactions belong to. In this example, I chose Supplies as the category. Then click update.

- The table will now reload and only show transactions that still need to be categorized. When done, just delete the word uncategorized from the search to see all of your transactions.


